In part I of this “Creating Orchestral Music In The Box” series, we’ll outline best practices for to composing a song completely within one software program, such as Pro Tools or Logic Pro. Mixing “outside the box” means you are using physical hardware such as a mixing desk or any number of other devices such as compressors, pre amps or reverb units. Every film composer has the dream of hearing their compositions played by a real live orchestra, and while achieving the exact same sonic effect as 90 people playing together in an acoustically sound room, there’s something fulfilling about creating orchestral music completely in the virtual world. This is not only useful in making the music sound as close to the finished product as possible, but also for directors who want to hear a well-made mockup of the music before hiring the orchestra and setting up the recording sessions.
Many productions are created using 100% virtual instruments to save money in the budget, and many composers have to learn how to make their virtual orchestra sound as real as possible as early in the process as possible. Ironically, the better and more successful of a composer you are, the less your “mockup” matters in terms of first listens, since filmmakers know what you’re capable of. However it’s also implied that your mockup will sound great because of your status as a high-tier composer, so it’s a catch-22 in that regard. If this is your first time working with a director or studio, then you’ll need to make the production as incredible as possible so filmmakers get the best first impression of you and your music. The following three steps are paramount to ensuring your mockup is high quality.
Step 1: Select Your Sample Libraries
Orchestral instrument libraries are becoming increasingly realistic and less expensive. There are many libraries available that offer the entire orchestra at your fingertips, with multiple articulations and settings to really give you full control of each instrument. The best value for beginners is to find a library that includes the entire orchestra, with less options for articulations, and then as your budget increases, start slowly purchasing individual sections such as brass, strings, winds, etc. and within each of those you will be able to give more expression and articulations.
There are a huge number of companies that offer amazing sample libraries. Action Strings by Native Instruments is just one example of the many sample packs you can download when orchestrating in the box.
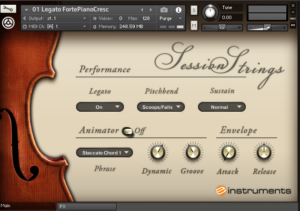
Action Strings by Native Instruments
The best way to figure out which ones work best for you is to organize by cost and value and then begin looking for reviews on YouTube. This will allow you to not only see the interface, but hear the instruments themselves and their articulations. Also be sure to check the quality of the samples themselves before purchasing. Some libraries will lower the cost in exchange for lower fidelity recordings of the instruments. This is especially true with 16 bit versus 24 bit, as these 8 bits will save you lots of money but also costs you 8 bits of quality. In this case, it’s a better idea to spend a little more and get the best sample rate & quality available. Wouldn’t you rather save up a little money and buy the better version? Or rush to get something that you probably won’t use in the future because of the quality, but you still spent money on?
Step 2: Automation
One of the laziest and most common mistakes in creating realistic sounding orchestral music is to not automate the volume and expression of your instruments. Automation can be thought of as adding that human touch to what is basically a digital unchanged virtual instrument. For example, when a violinist plays a sustained note or chord, the musician usually doesn’t hold the same volume from start to finish.
There is some level of natural volume variation where the volume starts lower, raises a bit, then lowers again. This is why many amateur (in-the-box) orchestral music lacks dynamics compared to real orchestral music that has an incredible amount of dynamics across all instruments. Most people aren’t aware that orchestral music actually has a lot of dynamics compared to pop music, which has a very low amount of dynamics. Of course this isn’t always the case between music styles, but it’s important to consider dynamic levels when automating your orchestral score.
When real orchestral musicians play, they innately create these dynamics naturally without any thought, When a sample of that same instrument plays in the virtual sense, it doesn’t include this ebb and flow created by the human, as samples are played purposefully straight for the most part. More advanced sample libraries you purchase over time will include articulations that most default orchestral libraries don’t come with. This is why automation is beyond important when composers work in a DAW. You can usually get away with minor automation when on a deadline, but if time permits, it’s important that everything is automated with as much detail as possible in the final score. In other words, the more automation, the more realistic.
Step 3: Bussing, Reverb and Compression
Now to dive into the more technical aspect of orchestral realism, ensuring that you create a bus for your reverb(s) gives you the best, cleanest, and most consistent quality of reverb. Speaking of reverb, have you ever heard a full orchestral piece that’s dry and without any reverb? It’s a bit jarring and in no way evokes the same beauty and emotion of the full orchestra in a hall. You can have the best samples out there with great automation precision but if the signal is dry and there’s no reverb, the entire song or piece will sound incredibly off. There are times that a dry instrument is necessary, maybe if a solo instrument represents a character or the lack of reverb is used in a creative or story-driven way. For the most part though, if you’re trying to achieve the effect of recording real instruments, giving it even the smallest amount of reverb will make a huge difference.
Compression is also a technique that should be used for “taming” a group of instruments. What is “Compression” you ask?Music compression is essentially the process of reducing an audio signal’s dynamic range. Dynamic range is the difference between the loudest and quietest parts of an audio signal. You need to reduce the dynamic range of most audio signals for them to sound natural on a recording.

Compressor Plugin
Pro tip: It’s always better to create your entire song without any compression, and then compress individual tracks that really need it. When it comes to the creation of orchestral music, the less compression the better, but there’s usually at least a couple tracks that require this. It’s usually best to compress solo instruments – which goes back to that concept of dynamics, where if this is a production you’re trying to achieve a realistic orchestral hall sound, don’t compress much if at all. If you’re trying to create an actual song like something on the radio or Spotify, you may want to compress the overall mix and more elements. Think of it this way, pop music has LOW dynamics and HIGH compression, while orchestral music has HIGH dynamics and LOW compression.
This concludes Part I of the “Creating Orchestral Music In The Box” series. In part 2, we’ll show you before and after examples of automation, reverbs, the best way to bus your reverbs and more technical advice on how to create music that sounds like a live orchestra.

Get your FREE copy of "The Essential Guide to Film Music Collaboration" to help create better music for your film and video projects.
About the Author

Adam Robert Galloway
Film Composer
Adam is a content creator for Compozly and a fellow music composer. He has been scoring films since 2012 and releasing original & cover songs as Muzikm4n since 2017. Despite no formal training in composition, Adam has spent many years learning how to produce and compose music that provides filmmakers with effective and unique scores.
© 2025 Compozly, LLC ALL RIGHTS RESERVED